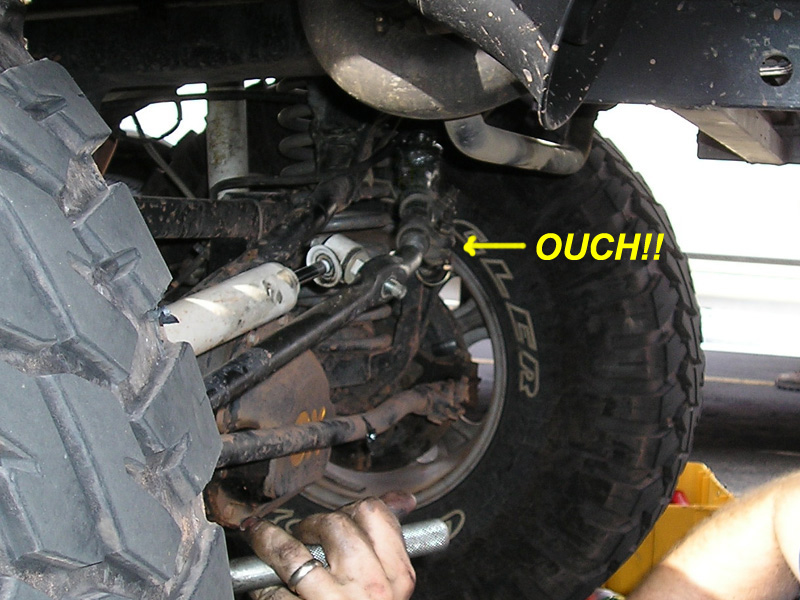
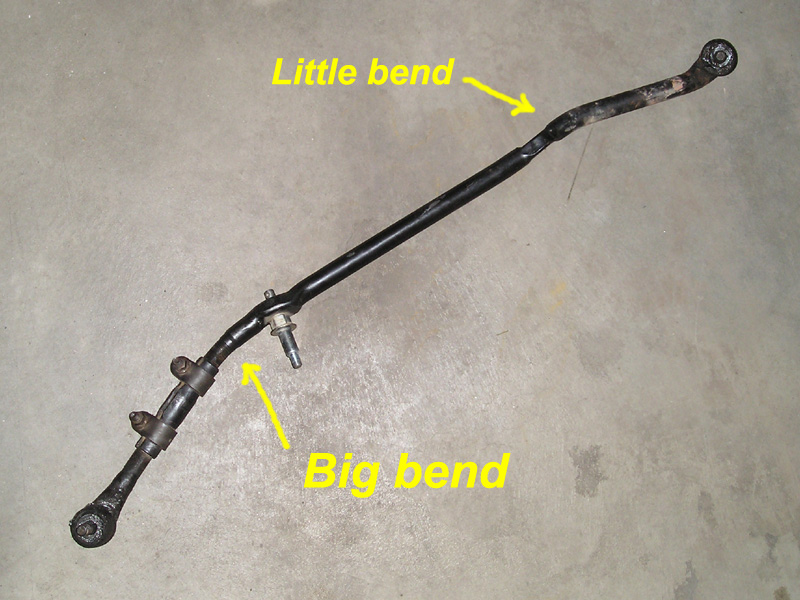
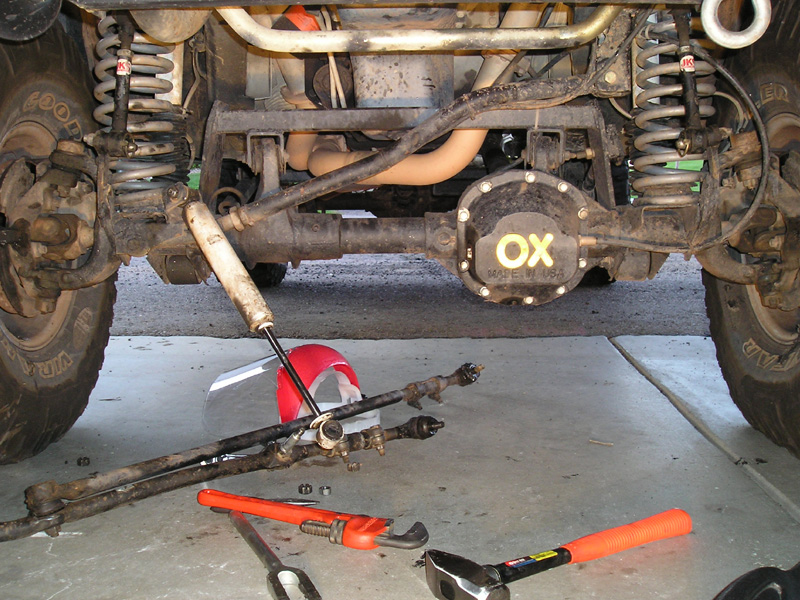
In June 2005 while attending Grand Slam West in Moab, I bent my drag link on Golden Spike going over the Golden Crack obstacle. This occurred despite careful driving (in other words not bouncing or gunning it through the crack), though I must admit that I don't usually flex it quite that much during my daily driving! Anyway, it was bent pretty bad (see pic below, it is bowing forward at the steering shock), and I thought that this would be the end of my wheeling trip. I certainly didn't want to attempt any more obstacles with a weakened drag link and risk getting stuck (or worse). Lucky for me however, one of the guys in the group had an "extra" drag link that he let me borrow. I did the swap right there in the City Market parking lot, then headed back out to the trails. Anyway, it was bent pretty bad (see pic below, it is bowing forward at the steering shock), and I thought that this would be the end of my wheeling trip. I certainly didn't want to attempt any more obstacles with a weakened drag link and risk getting stuck (or worse). Lucky for me however, one of the guys in the group had an "extra" drag link that he let me borrow. I did the swap right there in the City Market parking lot, then headed back out to the trails.
After getting back from Moab, I started looking into beefing up the steering. Not only did I want to replace the stock tie rod and drag link, I also decided to do something to reinforce the steering box. Three different ZJ's had broken their steering boxes at Grand Slam the week before, so I figured it would be a good time to address this vulnerability as well. When I called Kevin at KevinsOffroad to order his steering box brace, I asked him what his thoughts were on the drag link and tie rod. He recommended a product he carries called the U-Turn from Off Road Only, a setup he has been running on his ZJ for some time.
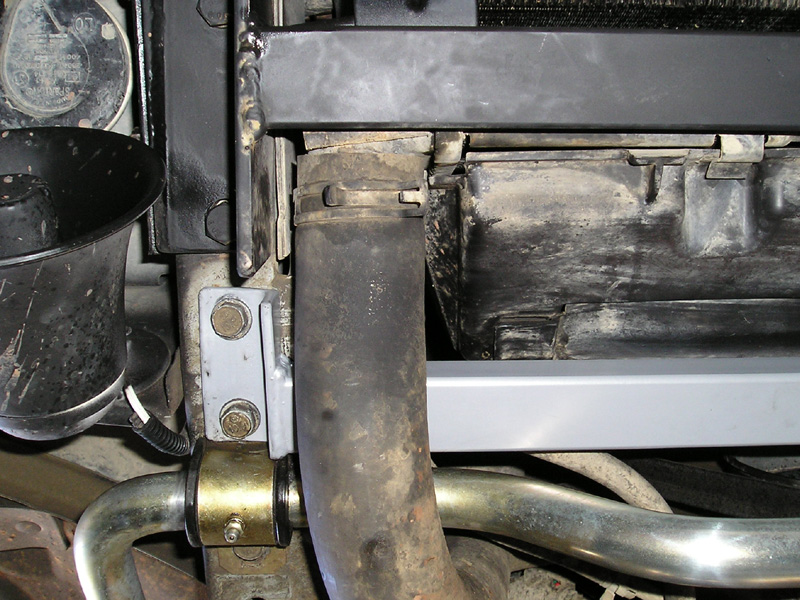
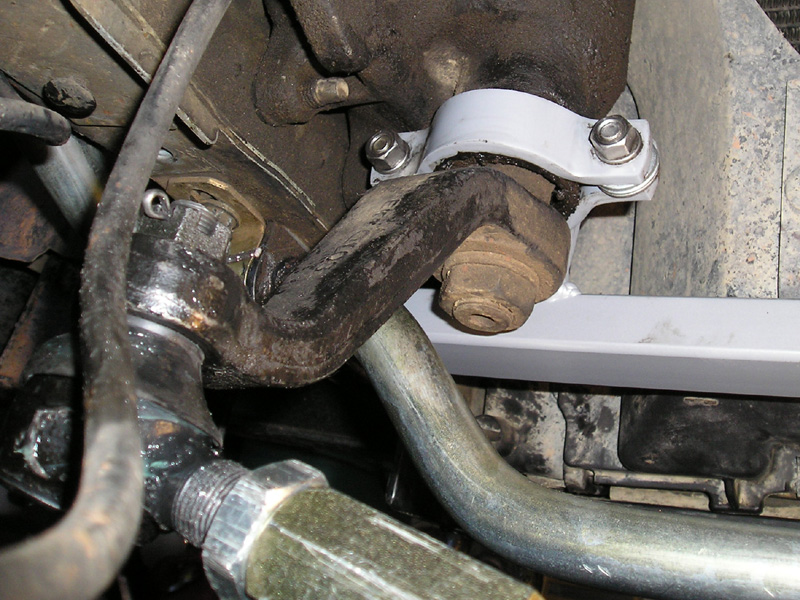
Once the steering box brace arrived, it was a fairly easy install. First, take out the four bolts holding on the skid plate, remove it, and slide the brace into place. Two bolts on either side secure the brace to the frame rail (one utilizes the front skid plate hole, the other shares the front track bar bolt). Two more bolts are used to tighten the clamp welded onto the brace which steadies the end of the steering box just proximal to the pitman arm attachment. It is a good idea to take this opportunity to make sure the three bolts that mount the steering box to the frame rail are snug. NOTE: The frame rail has a slight bend to it where each bracket must mount. Tighten the bolts until the bracket ends bend (they are soft enough and will not break) to make them flush with the frame rails.
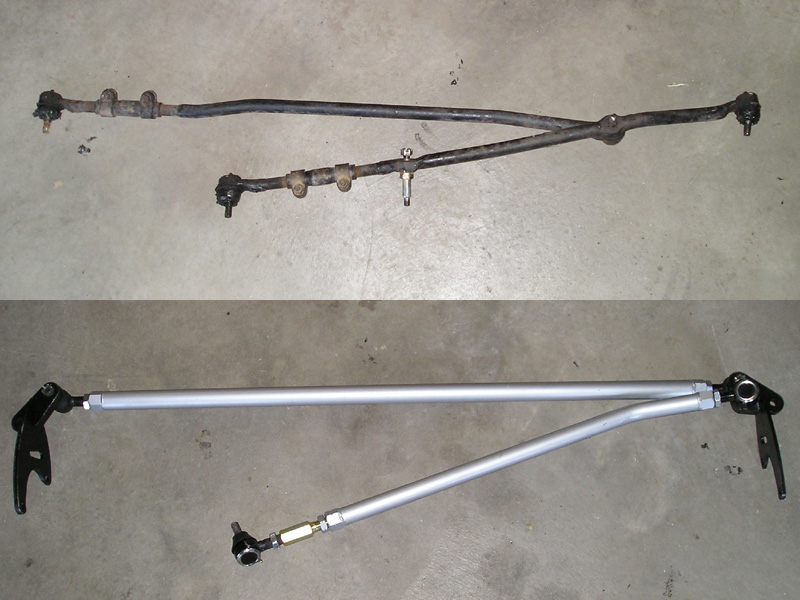
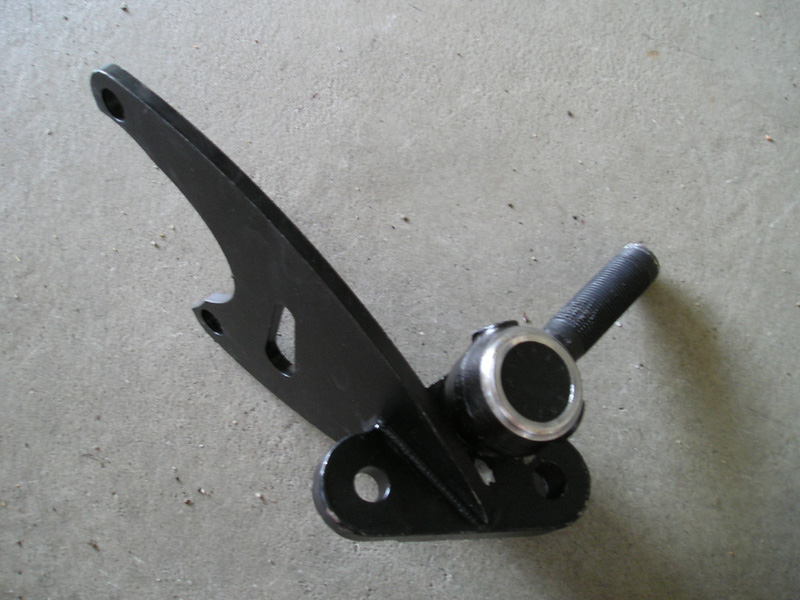
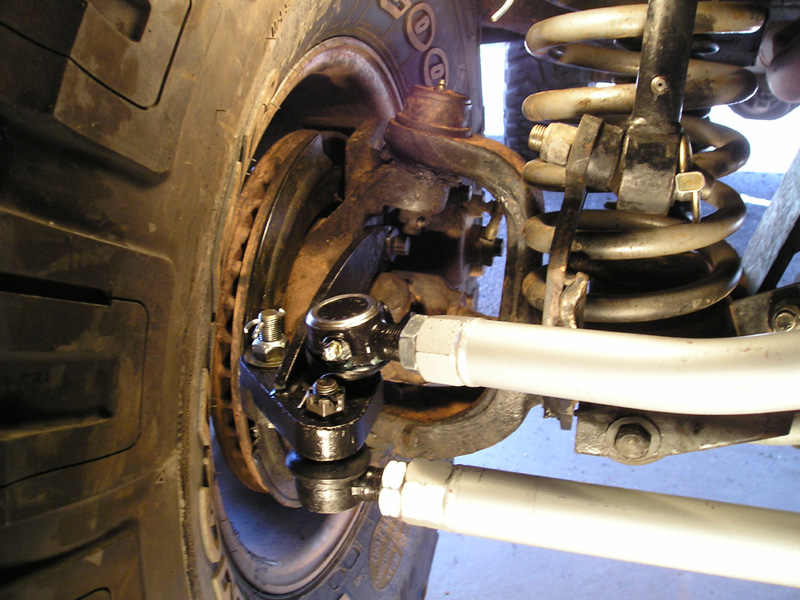
A couple of days later the U-Turn I orderd from KevinsOffroad arrived. Talk about beefy! Compared to the stock setup, these chromoly components look TOUGH! I really don't see bending this drag link like I did the stock one (pictured again on left).
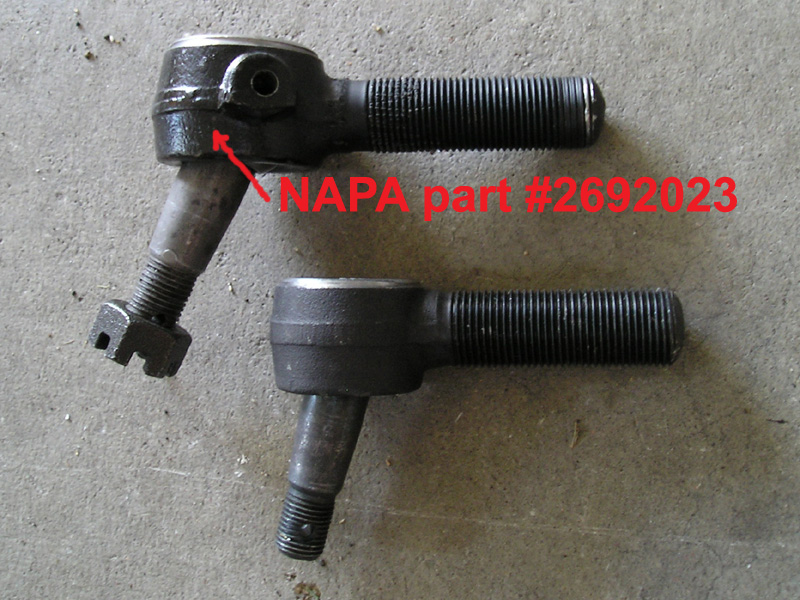
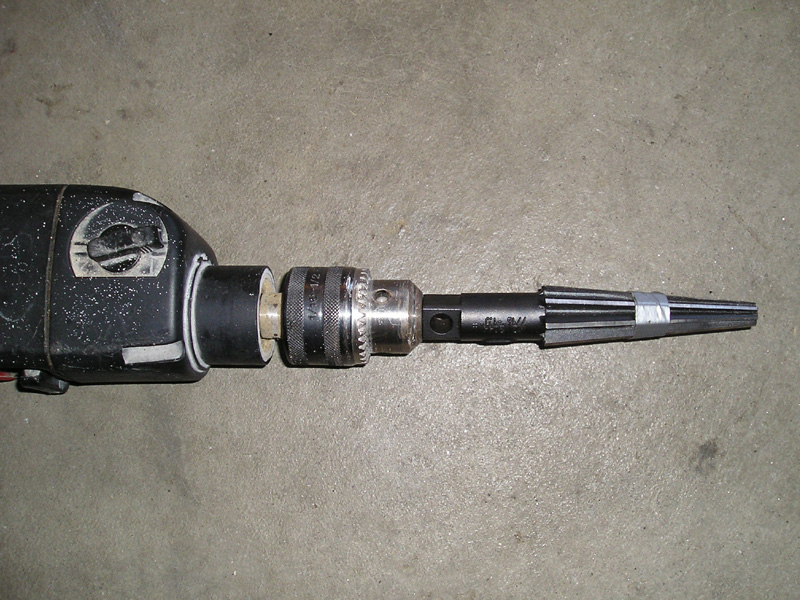
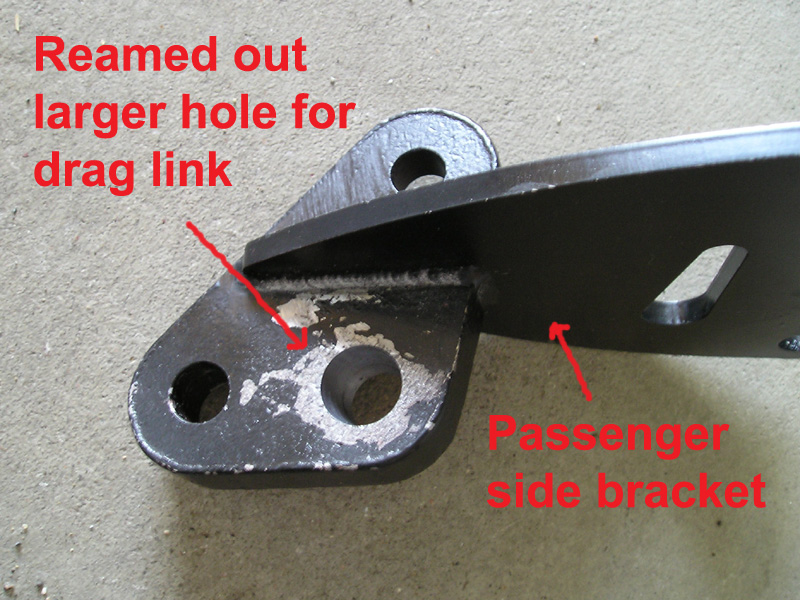
Since the setup is designed for a TJ with 3" of lift, some minor modifications needed to be done to fit my ZJ with 7" of lift. Kevin recommended using slightly beefier ends with more articulation for the drag link (NAPA part #2692023). Both are right-handed tie rod ends (terminology that is a little confusing since in this case they are used on the drag link, not the tie rod). The larger range-of-motion in the tie rod ends is necessary in order to minimize the stress placed on these parts, as well as the pitman arm and other components. Since the taper is of a larger diameter, I had to ream out two slightly bigger drag link holes: one in the bracket on the passenger side, and the other in the pitman arm. I used a drill press to do the former, and a hand-held 1/2" drill for the latter. For the tie rod itself, I used the tie rod ends that came with the U-Turn kit.
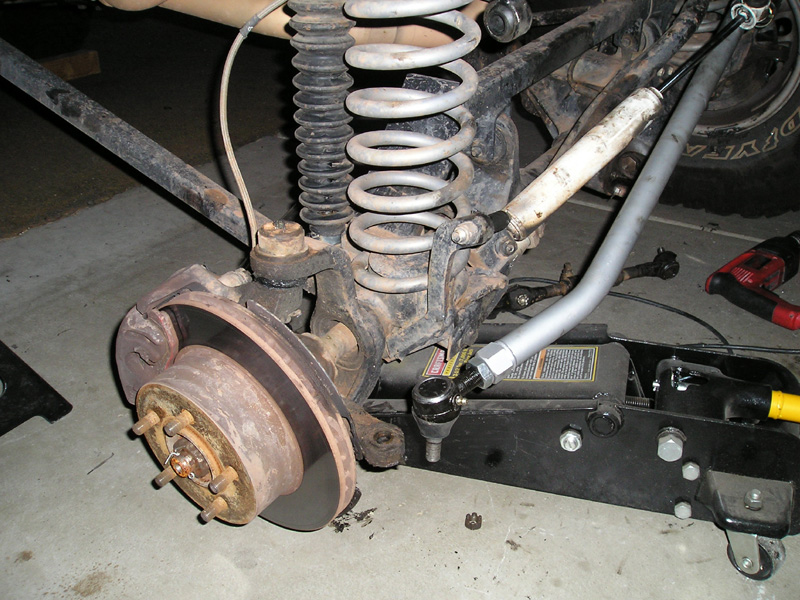
To make the installation a little easier, I took off the passenger side tire. Not only did this make torquing the bolts easier, it also allowed me to droop the axle with and without the tie rod and drag link connected. The reason I did this was so that I could reassure myself that the orientation of the drag link, with the bend slightly forward, did not limit droop (which would have indicated potentially excessive stress on the tie rod end, etc.). The droop remained at 10" before and after, so I am confident that wear-and-tear will be minimized.
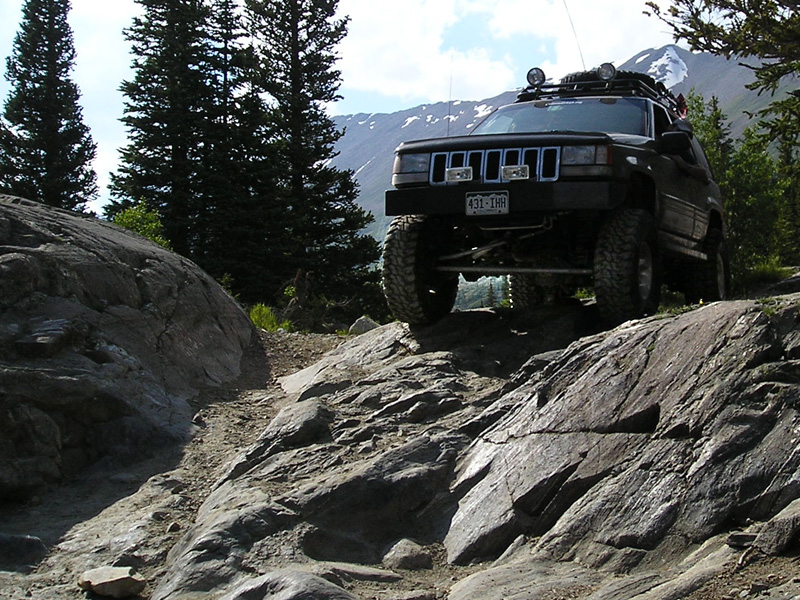
I must admit I was a bit nervous when I first took it for a test drive at 1AM the day before heading to Wheeler Lake. However, I was pleasantly surprised to find that not only did the steering seem smoother, it also was more responsive. Turning corners was easier, and it held lines better. I wasn't disappointed when I took it out on the trail, either. Now the steering is less likely to have problems under strenuous conditions, and flex shots look even better with the U-Turn hardware under there!
 Back to Main Page Back to Main Page
|